
How to Make Chebakia the Easy Way –
By: Josie Aiyla Lembirik –
Introduction
–
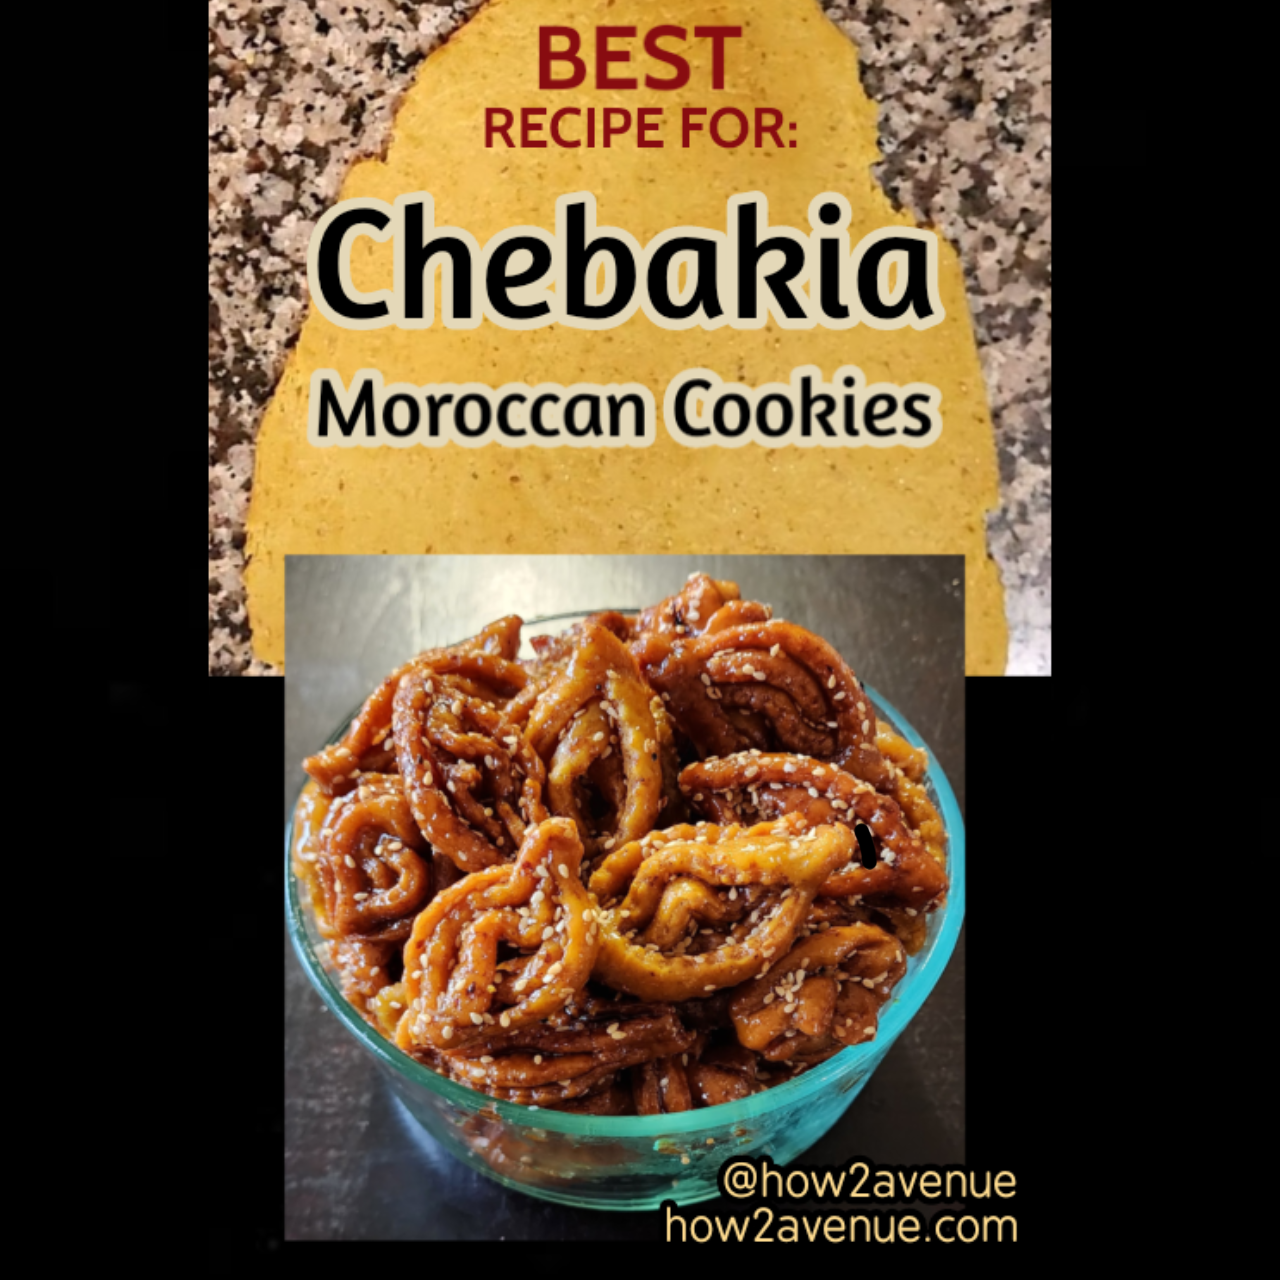
Chebakia is a Moroccan sesame cookie served during Ramadan and many other special occasions. The process first includes making the dough and then shaping each Moroccan treat into a unique oval flower shape. The chebakia is then fried and placed in honey to add an even more tasty touch to the Moroccan cookie!
This post has all the helpful and informative content you need in order to successfully make the best looking and tasting chebakia Ramadan treats. Make sure to scroll down to the video I created where you will discover the absolute easiest way to fold chebakia Moroccan cookies.
These beautiful looking sesame treats are so incredibly delicious and are actually really fun to make! I hope you find my post and video helpful (I.S.A). Enjoy making these yummy cookies and sharing them with your loved ones!
⏳ Approximately 1 hr & 45 mins
✴️ Makes approximately 2.3 kg of Moroccan treats
Ingredients –
Dry Ingredients
◾ 4 cups (1/2 kg) of flour [Note: If dough seems too wet or sticky, add a little more flour as needed]
◾ 1/2 teaspoon of salt
◾ 1/2 teaspoon of baking powder
◾ 1/4 teaspoon of yellow Moroccan colorant [Note: This is only available in Morocco, so if you have trouble finding this, you can use 1/3 teaspoon of turmeric instead and it will work just as well.]
◾ 1 and 1/2 teaspoons ground cinnamon
◾ 7.2 oz (a little less than 1 cup) of golden toasted unhulled sesame seeds
◾ 1 and 1/3 teaspoons ground anise
Wet Ingredients
◾ 1/4 cup of olive oil
◾ 1 egg
◾ 1/4 cup of white distilled vinegar
◾ 1/4 cup of orange flower water (This is also referred to as orange blossom water.)
◾ 1/4 cup of melted butter
◾ 1 teaspoon of active yeast (Mix and dissolve this into 1/3 cup of warm water separately and then add it to the mixing bowl.)
Other Ingredients
◾ 1 and 2/3 liters of vegetable oil (This will be used to fry the chebakia.)
◾ 3 lbs of honey
◾ 2 and 1/4 tablespoons of orange flower water
◾ 2/3 cup of golden toasted unhulled sesame seeds (These will be used to sprinkle on top of the chebakia cookies after dipping them in honey.)
Directions –
______________Step
➖️ Step 1
Lay out sesame seeds on a large baking pan, making sure to fully spread them out. Toast the sesame seeds in the oven at 375°F for approximately 10-12 minutes. Keep an eye on them and make sure not to burn them. Aim to only slightly toast them to a light tan color. Let the toasted sesame seeds completely cool down while you move on to making the chebakia Moroccan cookie dough.
➖️ Step 2
In a large mixing bowl or a KitchenAid Stand Mixer®️, mix all dry ingredients together thoroughly. Once the toasted sesame seeds have completely cooled down, fully grind 7.2 oz of the toasted sesame seeds in a food processor. [Note: If you do not have a food processor, a coffee grinder will work just as well if you only grind small portions at a time.] Add the toasted ground sesame seeds to the mixture of all the dry ingredients and then proceed to the next step. Please make sure not to add any of the wet ingredients to the mixture until all the dry ingredients are thoroughly mixed. To speed up the mixing process, I definitely recommend using the KitchenAid®️ Stand Mixer verses just a regular mixing bowl. I didn’t realize how incredible of a tool this mixer was for baking until my sister-in-law introduced it to me.
➖️ Step 3
Add all of the wet ingredients to the mixture and continue mixing everything thoroughly together. As the mixture starts to become one piece, use your hands to repeatedly squeeze the dough together in order to form a dough that is somewhat firm, but also flexible at the same time. It may seem like the dough is not forming well at first due to it looking all sticky or conversely all dry, but don’t add flour or water quite yet. Just keep mixing and squeezing it together. It takes longer than you would think to get the dough to form correctly. That’s why I like to use my KitchenAid®️ Stand Mixer to ensure everything is quickly and thoroughly mixed together, making the process of forming the dough go way faster. As mentioned above, using your hands to help form the dough also works extremely well. If as your mixing and squeezing the dough together it continues to appear and feel too dry, add water little by little to give the dough a bit more moisture. Conversely, if as your forming the dough it continues to appear and feel too sticky, add flour little by little to take away some of that extra moisture.
➖️ Step 4
Once the dough is formed correctly, split it up into four or five equal parts. Form each part into hump-shaped pieces and then place each piece individually into ziplock bags. Leave the hump-shaped dough pieces to sit for at least 20 minutes or more. This will give the dough a chance to rise more.
➖️ Step 5
Following the 20 minutes or more of letting the dough pieces sit, you should notice a significant rise in the dough parts. This is perfect! It is now time to roll, cut, and fold the chebakia. You will need a small zig-zag pizza cutter for the cutting. I highly recommend this one, as it works extremely well! I went through three of these cutters before finding this perfect one. The other ones weren’t clearly showing the zig-zag pattern in the cuts.
After about two years of continuing to make average looking chebakia, this year I became determined to find the easiest and best looking way to cut and fold the chebakia. I experimented for nearly six hours the other day and I finally found the perfect method.
In my video below, you will discover the best and easiest way to cut and fold chebakia Moroccan cookies. Enjoy the video and make sure to stick around after for the rest of the steps where I will discuss how to do the frying, coating in honey, and decorating of the chebakia.
➖️ Step 6
Now that you have learned the best and easiest way to fold the chebakia Moroccan treats, you can now fry them. After you have finished folding one baking sheet of the cookies, start frying those while folding the rest of the chebakia cookies.
To do this, set your stove to medium-low and heat 1 and 1/4 inches of vegetable oil in a big frying pan with high edges. Simultaneously get a big pot and heat up the honey on medium heat. Remember to keep folding the remaining chebakia dough while you wait for the vegetable oil and honey to heat up. As soon as you see the honey start to boil, turn the stove off right away so it doesn’t boil over. Then add the 2 and 1/4 tablespoons of orange flower water to the pot of honey and mix it. Next start frying the first batch of folded chebakia on medium-low until the cookies turn a golden-tan color (takes approximately 7-9 minutes). Once the chebakia cookies are a golden-tan color, take them out of the oil with a slotted cooking spoon and immediately place them into the pot of honey.
➖️ Step 7
Leave the first batch of chebakia cookies in the pot of honey for approximately 8-10 minutes in order to ensure the Moroccan treats get fully coated with honey. While you wait, finish folding the second batch of chebakia and start frying them. Once the first batch of chebakia cookies are fully coated with honey, take them out of the pot and place them into a colander to drain for one minute. What I do is take a colander and place it on top of another empty large pot so I can reuse the honey that is drained into the pot. While you do all of this, remember to keep up with folding the remaining chebakia dough so that you don’t have to keep reheating the vegetable oil and honey.
➖️ Step 8
After each batch of chebakia cookies are done draining some of the honey, place them in layers into a large Pyrex®️ container or any large casserole dish. Decorate each layer of the Moroccan treats by sprinkling them with golden toasted unhulled sesame seeds.
Congratulations! You’re done! Nice work. Your delicious chebakia Moroccan cookies are ready to be served! I hope my post was helpful and am wishing you and your family and friends peace and happiness as you enjoy these yummy treats together! Feel free to contact me if you have any questions about the recipe.
Author: Josie Aiyla Lembirik | How 2 Avenue
Published: April 6, 2023
Last Updated: April 23, 2023
______________
_________________________
_________________________